
 A simple off-the-shelf storage container like this can add much needed storage space for bugging out.
I’m not sure about your specific area, but ‘round these parts I seem to be seeing a lot of people driving around with roof racks haphazardly mounted on random vehicles. The trend is usually 18-year-old kids with roof racks and giant lights mounted on ‘98 Civics. It’s also middle-aged dudes who slam Home Depot roof baskets on their Explorers in the hopes of cultivating the “I’m an overlander!” vibe.
However, take note of these people and embrace them, for they unwittingly point us the way to a useful consideration:
You can put roof racks on your car to help you bug out.
What ARE Roof Racks?
Very simply put, roof racks are a set of (usually) metal bars and racks installed on a vehicle’s roof to provide additional mounting points for accessories. Roof racks are a superb way to give you increased cargo carrying capacity, illumination, shelter, and other vital attributes – all by bolting the appropriate items to them.
Most modern roof racks are comprised of two main parts: the rails, which are usually semi-permanently affixed to the vehicle, and the cross bars, which span the distance between the roof rails. The rails provide a strong structure to carry the load installed on the crossbars. The crossbars give you an area to mount the accessories.
Factory Installed Racks
Many outdoors-oriented vehicles – for instance, Subaru Outbacks – usually come from the factory with roof rack rails already installed. The same goes for many mini vans. Vehicles like these have integral crossbars that store in-line on the tops of the roof rails – (one per side) and can be deployed to swing out and lock in the opposite side roof rails.
This creates a quick, easy-to-use system that doesn’t have you accidentally leaving parts at home, since the whole system is permanently affixed to the vehicle itself.
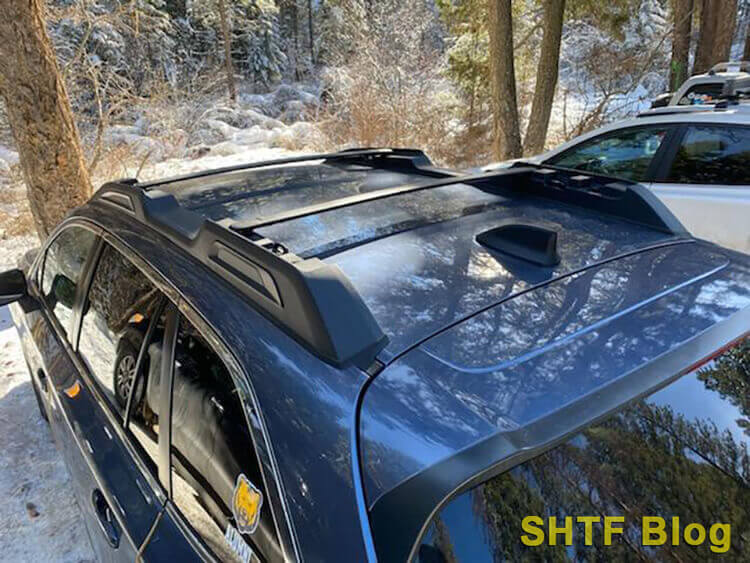 A Subaru Outback with crossbars locked in place. Photo Courtesy Doc Montana.
Being able to swing the crossbars out of the way also gives the added benefit of greatly decreased wind noise and increased gas mileage.
Some vehicles, like my old 2014 Toyota 4Runner, have the roof rails installed from the factory, but may or may not come with the OEM crossbars. These vehicles, especially if you buy them used (like I did) will have the removable cross bars taken off the rails, and then when the vehicle is traded in, the previous owners will forget the crossbars in the garage or wherever. So you’re sorta out of luck – but at least you still have the rails.
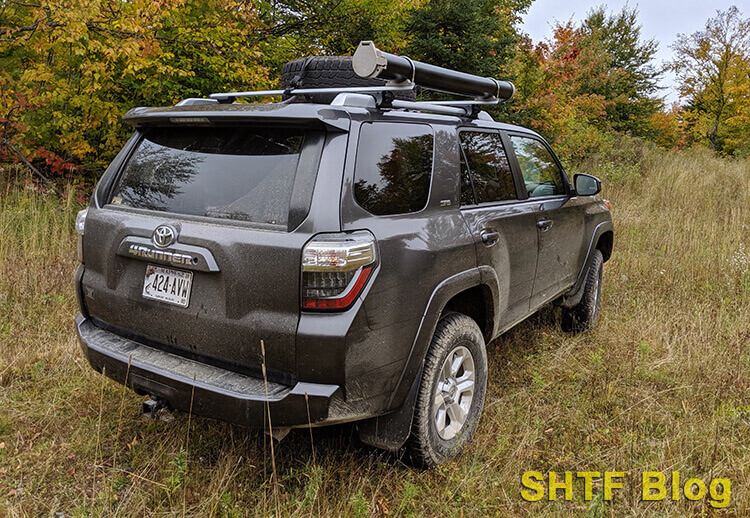 Even cheap crossbars are very functional.
In this case, you can contact a dealer to get the factory crossbars (which are usually really expensive) or you can go to Amazon or eBay to get some universal crossbars like I did. I think I spent $99 for some Amazon specials, and they ended up being very secure and having greater load capacity and increased length over the factory crossbars.
 Amazon Basics Universal Cross Rail Roof Rack, 52 inches,Pack of 2
- 52 inch long universal cross rail roof rack mounts to most cars, SUVs, or crossovers with raised longitudinal rails, gap between rail and car roof must be 1/2 inch (1.3cm) and above, distance between two rails must be bigger than 38.6 inch (98cm) and smaller than 46 inch (117cm), diameter of rail must be within 1.4-2.1 inch (36-55mm).
- Installing rubber sealing trips into roof racks as per paper UM or DP video can reduce wind noise, the rubber sealing strips is included in product packaging.
- Heavy-duty aluminum crossbars offer a strong, lightweight construction that’s resistant to corrosion; 165 pound capacity
The downside is that these universal crossbars usually stand much higher than factory bars, as they mount ABOVE the rails, not between them. As such, they tend to be very noisy on the road at speed, and can cut fuel efficiency drastically.
My 4Runner (which was already miserable in the MPG department) immediately lost over a mile per gallon with the crossbars installed on the roof rack. Keep that in mind; there’s no free cake.
Vehicles with No Factory Rails
What about vehicles with no roof racks or rails from the factory? Never fear if you fall into this category; solutions abound!
Newer vehicles may surprise you! Some cars – like my wife’s Subaru Legacy – do not come from the factory with roof rack rails. However, there are slots or mounting points that are integral to the car roof.
Our Legacy actually has covered mounting points for factory Subaru roof racks which have no rail system; it’s just crossbars that bolt to the roof. This is a great system for its utter simplicity and lack of required parts, but not having the roof rails means you have less locations available for tie-down securing points.
If you have an older vehicle or simply a car/truck/SUV/minivan that doesn’t come ready for roof rack installation of any sort, we can find solutions for you too. A quick search for “Universal Roof Racks” on Amazon or your favorite web search page will net you a bazillion options. These usually employ rubber-coated hooks and tension systems that attach to your door openings or rain gutters.
Care must be taken when installing these, as they are ostensibly not as secure as a dedicated roof rack system that bolts directly to a vehicle. However, properly installed and with care taken to load capacity and vehicle speed, they can work well.
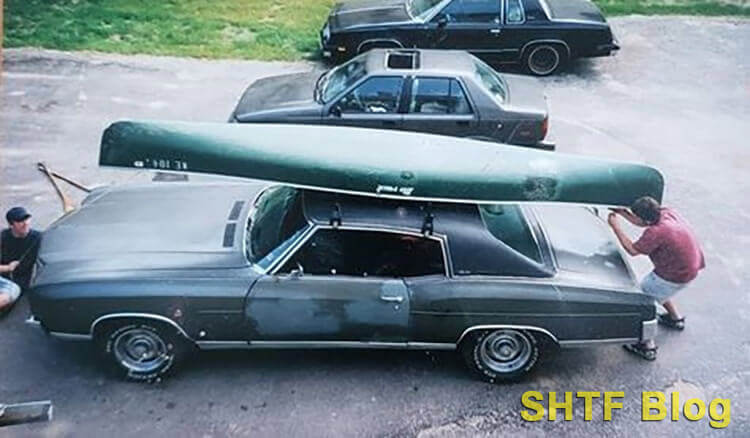 We put roof racks on an old Monte Carlo. You have no excuse.
So, whether you have a shiny new Toyota Land Cruiser or an ‘84 Tempo, be comforted by knowing that you have roof rack solutions available to you. When I was in high school, a buddy had a ‘70 Chevy Monte Carlo for a daily driver, and we had bolt-on roof racks we used all the time to carry canoes and other gear – so don’t let having an older car stop you from expanding your vehicle’s versatility with a roof rack for bugging out!
How Much Can You Put on a Roof Rack?
Once you have a properly secured roof rack, what can you throw on that sucker? I could tell you there are no rules – load that sucker up and throttle out to the BOL! But, I’d be misleading you.
The versatility of a good roof rack system for bugging out is amazing – but there’s a limit. A weight and load limit, to be specific. Not only do you have to account for direct gravity dead load of accumulated weight you are putting on the roof of the car, you also need to worry about wind loads, which will increase dramatically with speed.
Most vehicles that come with racks from the factory have a weight limit listed either on the rack system itself, or in the owner’s manual. If the vehicle never came with racks (like your ‘84 Tempo) you need to check on the paperwork for the weight limit of the aftermarket rack itself.
I’ve found that most factory and aftermarket roof racks seem to top out at about 75-100 pounds of gear. Sure there are exceptions, like Prinsu’s full-length roof rack that you’ll often see on overlanding rigs – these can often carry static (non-moving) loads of up to 600lbs – but they eschew the usual rail/crossbar system and bolt directly to the roof, spreading the weight out over a greater area.
They are much more expensive and usually only an option for pickups and SUVs – so if you’re looking for a roof rack system for a daily driver it might not be the best for you – but if you can find one for your vehicle, they can increase your carrying capacity greatly!
Wind Loads
The other type of load you need to worry about exerting on your roof rack system is wind loads. These usually are not listed on racks because it’s hard to quantify for the rank and file; it’s more of an issue you need to be cognizant of and be alert for issues after you’ve loaded the rack.
Wind loads push on the cargo in your roof rack opposite of the direction of travel – and in some cases laterally (think passing a tractor trailer on the highway and the wind that pushes your whole vehicle around).
However, if you have roof racks that are mounted well above the roof line – like the universal crossbars I mentioned earlier – wind can get underneath your roof-mounted rack and push UP on the load, making it want to jump off the roof.
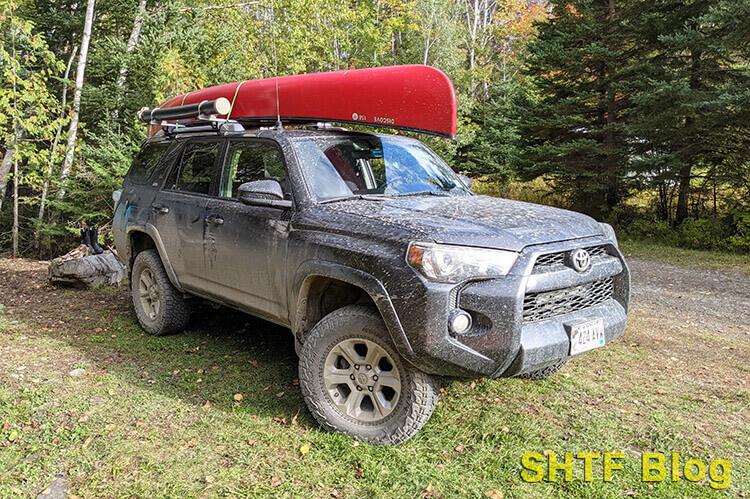
For instance, a canoe mounted gunwales-down on a set of high-mounted crossbars could easily get wind pressure underneath and be pulled up and off the rack with lift – I’ve seen it happen before.
To combat wind loads, make sure your roof rack load isn’t tall – mount it low to keep the center of gravity low and the forces exerted by mind at a minimum level. Also be sure to tie your load down securely at multiple points in case your straps fail. Long loads like canoes should be tied down to the vehicle fore and aft as well as in the middle to make sure it won’t lift up, up, and away!
Test the Load for Bugging Out
The best advice I can give you when loading your roof rack is to perform a pre-emptive strike: put all the gear you foresee using in a bug-out situation on your roof rack, tie it down to the best of your abilities, and take the whole works for a spin down the road. Listen and feel for the load shifting, sliding, banging around.
Larger items that are tied down should be watched to ensure they don’t slide around. If you hear banging or thumping up above, STOP AND REORGANIZE. Banging is a sure sign that items are lifting from wind pressure then slamming back down. If you don’t address this malady immediately, you’re going to lose something. After a few miles, pull over and re-tighten your straps.
Speaking of straps – be sure to use high quality tie-downs. Bungee cords and cargo nets should never be used as primary anchor systems; use top-shelf ratchet straps and/or rope. This is gear you need to stick with you to save your life when in a SHTF scenario. You want to guarantee that $0.99 Wal-Mart bungee cord is going to save your gear as you careen away from danger? Me either.
Making the Most of a Roof Rack for Bugging Out
For the daily grind of life, your roof rack accessories may be drastically different than the Get Out of Dodge loadout. For instance, your roof rack may be employed to carry bikes, snowboards, or rooftop cargo carriers – whatever you may need as you throttle away to your destination to escape the humdrum of a 9-5.
But what about being ready for a SHTF event? What would you use to increase your vehicle’s versatility? There are quite literally tens of thousands of options and configurations or items you can plop on to of your vehicle to assist your bugging-out efforts. Where to start?
The overlanding community is a great place to start looking for ideas. While overlanding at first glance may seem to be more about using the vehicle as a mobile man cave as you scoot from rugged campsite to rugged campsite to take pictures of your $70,000 decked-out SUV for your Instagram account, there are lots of great ideas to be gleaned from the utilized systems of overlanders.
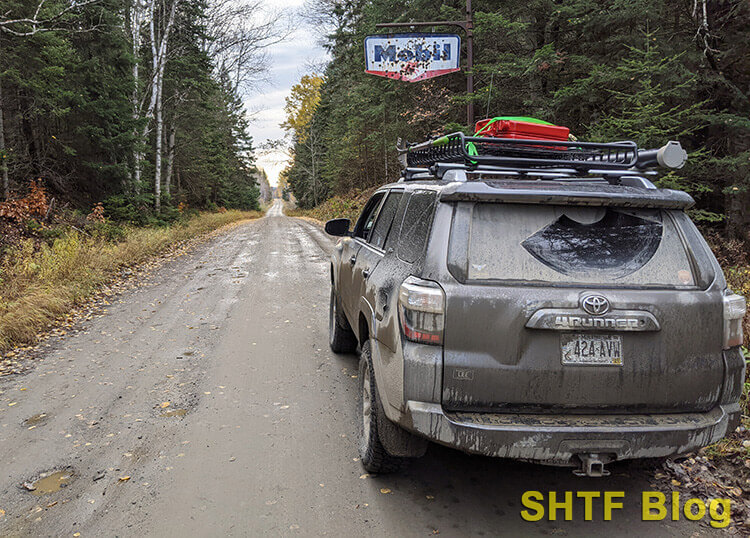 Roof Top Cargo Baskets are a great first addition to your roof rack.
Roof Top Cargo Baskets
The most common addition for roof racks you’ll generally notice is a roof top cargo basket – and that’s because these are a fantastic idea. Metal cargo baskets are a good bang for the buck – an inexpensive-but-still-useful generic one will run you about $150.
These are good general-purpose units that will get your gear where it needs to go – but the cheaper ones can rust out quickly and only be usable without repair for a couple-few years if you leave them mounted on your vehicle.
More expensive name brand rooftop cargo baskets will have better powder coating to promote longer life and will likely also have engineered accessories that bolt to the basket to increase its modularity and usefulness.
If you want a rooftop cargo basket, don’t be afraid to search used and get quality for less money. I hounded Craigslist for a Yakima Loadwarrior cargo basket with a cargo net that I eventually sourced for $150; they sell new for close to $450-500.
I threw bucks down for a Yakima extension to increase the length of the Loadwarrior basket – $168 – and Yakima shovel/axe mounting brackets – $60 – and I had a dialed-in extended roof basket system for my 4Runner for less than the cost of a new one without any accessories. The whole works mounted securely right to my crossbars lickety-split.
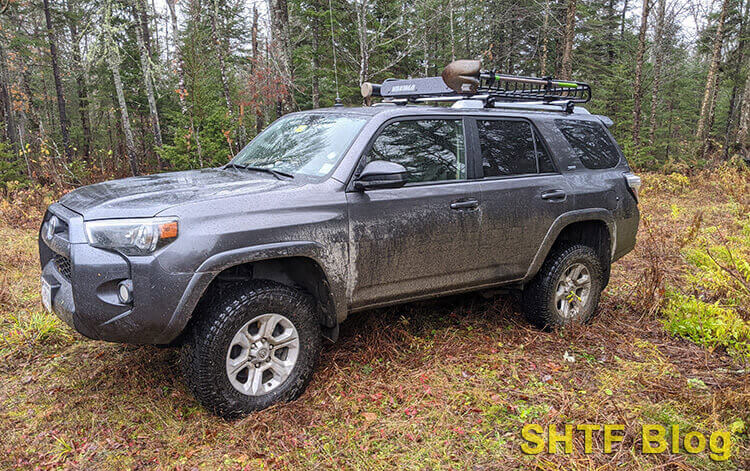 This Yakima Roof Top cargo basket served me very well!
I used my Yakima basket for everything – I carried a spare tire up there when I went on northern Maine hunting trips; I threw bags of manure in the basket when I didn’t want them stinking up the interior of my SUV. On family road trips, a collapsed dog crate and duffel bags lived in the Yakima roof basket when the interior was full.
Muddy clothes and gear went up top to keep my 4Runner’s interior clean after muddy/snowy hunting and fishing trips. I even put a canoe up there to try it out- the system was a little squirrely but it worked when properly tied down. The sky’s the limit – literally – with a rooftop cargo carrier. Rooftop cargo baskets are always a stellar addition to your roof rack system.
Roof Top Tents and Awnings
While I’m not personally a fan of Roof Top Tents (RTTs), there are lots of people who love them – either for the camping aspect or to drive around with them on top of your vehicle to loudly proclaim to those around you that you have disposable income.
In a nutshell, these are tents that are mounted to a framework on your roof, and collapse down into portable form for transport. Though the system seems to be currently in a state of evolution, most that you will find will be expensive and offer varying degrees of difficulty in deploying and packing away.
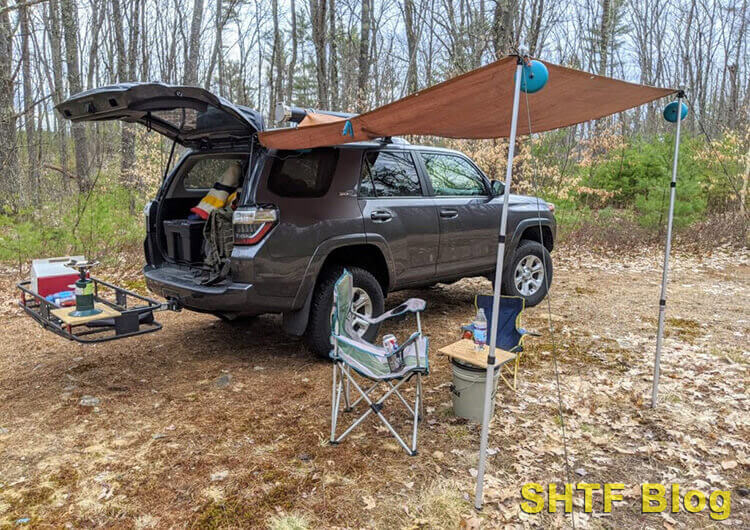 My Roof Rack DIY Awning hard at work
If you intend of using your vehicle as a portable camping platform in a bug-out scenario, a RTT may have some utility for you – just know that in a bout of immediate unplanned danger, you can’t just hop in the car and drive off when the RTT is set up; they usually take a few minutes to transform pack to transport mode.
Personally, I prefer ground tents to ones mounted on roof racks, but depending on your location and situation, these may not be tenable. If you’re looking towards a roof top tent, do your homework and try one out first before you commit to an expensive, cumbersome apparatus stuck to the top of your Accord’s roof.
 An ARB awning caught in travel mode.
The same applies to collapsible awnings like ARB’s fantastic units. These are great to provide some shelter if it’s raining or snowing; some even offer perimeter screens to keep mosquitoes and blackflies out.
I made a DIY awning that was attached to my roof rack and it had some utility, but it was cumbersome to set up and take down. However, if I was staying in one spot for a while, the awning would be a most welcome addition to camp. I hung solar motion-activated lights on mine and it works great as far as awnings go and what they do.
Just remember that if they’re attached to your roof rack, you really can’t hop in your vehicle and drive off with it set up.
Lighting and Illumination
A roof rack is a great place to plunk some extra lights; many aftermarket roof racks come with light bars or floodlights already installed. If not, clamp-on lights are a great way to provide 360-degree lighting around your vehicle for not a ton of money – especially if you’re handy with wiring.
Cargo Baskets and Bike Mounts
Many aftermarket manufacturers offer bolt-on bicycle mounts and cargo carriers (we always called them hamburger boxes growing up). Yakima, Thule, and a myriad chinese companies make mounts for these systems that will clamp right to your crossbars without needing a rooftop basket.
Several companies make soft collapsible dry bags for roof racks; these are utter dynamite for a roof rack bug out system; throw clothes, food, tools, whatever in the bag, and zip it up – whatever is inside ain’t getting wet. Rigid cargo carriers are sturdier and just as weather proof but less flexible on the contents of the payload.
A soft bag carrier you can stuff to the hilt with clothes; a hinged-top rigid carrier, not so much. Both are good options if you need extra cargo capacity that needs to stay dry.
Toolboxes, Gun Boxes, Gas Can Carriers
Depending on your roof rack system or roof top cargo basket, you can probably source many different accessories that bolt solidly to the framework on top of your rig. Jerrycan mounts, spare tire mounts, gun boxes, tool boxes, ladders, water carriers – all kinds of useful things – can be found and stuck up top.
Do keep in mind, though – heavy items are hard to get up to the roof racks, and even harder to get down without assistance. I wanted to mount a full 5-gallon jerry can to my Yakima roof basket, and I’m glad I gave it a run before I mounted the jerry can mount to the basket.
Turns out that a full 5-gallon metal jerry can weighs about 50lbs; I could kinda swing it up there by myself without a ladder, but getting it down was a disaster; I almost broke a side window of my 4Runner and only saved the paint of the truck by hurling the can to the side, denting the can and risking a ruptured fuel can.
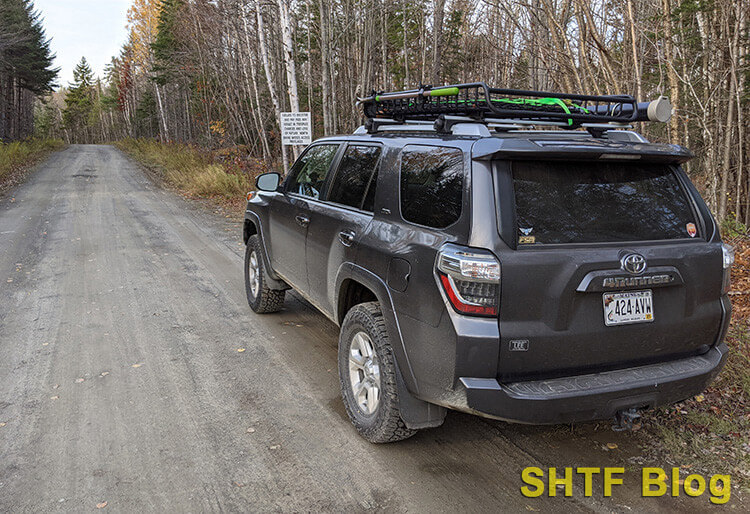 This Yakima basket provides a perfect mounting location for a sturdy shovel.
Similarly, when I carried a full-sized spare for my 4Runner on the roof rack, I had to climb on the roof, lift the tire up, and throw it to the ground – which resulted in a wildly bouncing 45-pound tire and run careening across my yard and through the neighbor’s garden. Oops.
If your last name isn’t Schwartzenegger, leave the heavy items down low or break them into multiple lighter packages that are easier to retrieve off the roof racks without destroying your joints or your gear. If you gotta put it up there, have help or have a plan to lower the gear to the ground safely. No need to blow your back out or damage your vital gear when the chips are down and you’re in survival mode.
Recovery Gear
The roof rack is an outstanding place to keep recovery gear. Mounts for shovels, hi-lift jacks, traction boards, etc., can be found online or made at home. With these items mounted on the outside of the roof racks, you ensure that the gear is always readily accessible and not covered up by multiple other items in the back of a vehicle. Emline wrote a great article on recovery kit tools for overlanding.
Other Stuff for Roof Racks
The items listed above are the most common items I see on roof racks; however, you don’t need to be limited to commercial offerings when designing your bug out roof rack system. For instance, the previously mentioned DIY awning I fashioned lived folded up inside a PVC tube that I U-bolted to my roof rack crossbars.
This capped “Utility Tube” (as I called it) served many purposes – I could roll my tarp awning and its poles up and stuff it in the tube. I could carry fishing rods (rolled up in canvas) inside the tube without risking damage to rod tips.
I put a cleaned metal soup can with a length of paracord tied through the bottom into the tube, so when you loaded the tube up with whatever gear you wanted, you just had to gently pull on the paracord and the soup can would push the contents out. Slick system.
 The PVC utility tube bolted to roof racks is incredibly versatile and easy to make.
If you’re handy with the tools, there is zero reason you couldn’t fashion any number of wooden or PVC DIY containers for the top of a roof rack. A little planning, ingenuity, and some elbow grease can really help you optimize your setup to get you out of danger and to your BOL in safety, with your gear ready to go.
Installing A Roof Rack
I recently installed a factory OEM Toyota roof rack on my 3rd gen double cab Toyota Tacoma TRD Off Road. This is one of the situations where the truck itself was already set up to accept the roof rack, but the truck shipped without the roof rack. I carry canoes around frequently in non-winter months, so I spent the $350 and ordered up the Toyota racks from a local dealership.

With the proper tools, the installation went reasonably quickly, and took me about an hour. I do think I’ll pull it apart this spring and replace the factory mild steel fasteners with hardened stainless steel bolts and screws. I’ll also use some silicone in addition to the factory rubber gaskets the roof rack kit provided to ensure water isn’t penetrating into the roof itself.
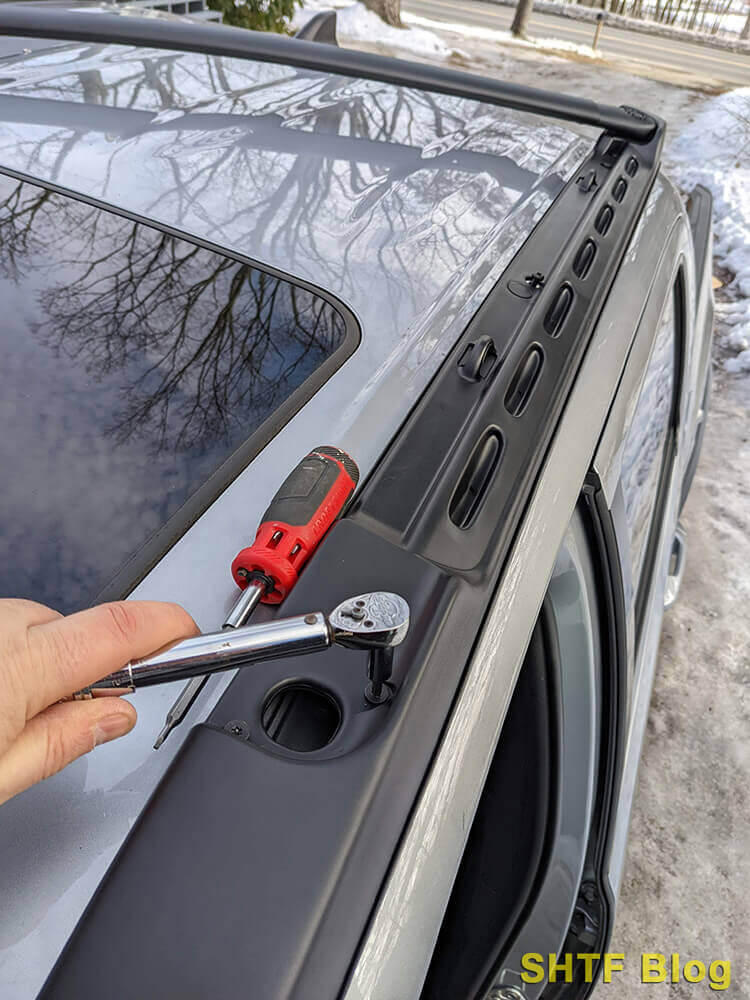 Roof racks aren’t impossible to install – an easy afternoon project.
But I’m including this in here to show that roof racks can be easy and obtainable, even if your vehicle never originally came with them installed.

Thoughts? Comments? What do you have on your roof rack? What would you put on a roof rack when bugging out?
